

Table of Contents
- How to Assemble Flat Pack Furniture: Preparation and Workspace Setup
- Essential Tools for Flat Pack Furniture Assembly
- Reading Instructions and Organizing Hardware
- Step-by-Step Assembly Process
- Common Flat Pack Mistakes to Avoid
- How Long Does Flat Pack Furniture Assembly Take?
- Flat Pack Assembly Tips for Success
- Conclusion
Last Updated: July 28, 2026
Assembling flat pack furniture might seem straightforward until you're staring at a pile of panels, hardware, and cryptic instructions. The Family Nest understands this challenge, learning to assemble flat pack furniture properly means the difference between a sturdy piece that lasts years and a wobbly disaster. This guide walks you through the entire process, from workspace preparation to final stability checks.
Most people rush into assembly without proper preparation, which is where mistakes happen. The next 20 minutes of planning will save you hours of frustration later.
How to Assemble Flat Pack Furniture: Preparation and Workspace Setup
Your workspace determines whether assembly goes smoothly or turns into chaos. The right location and protective surface prevent damage to both furniture and floor while making the process faster and safer.
Choosing the Right Location
Pick a space larger than you think you need. Lay out all panels and components on the floor before starting to confirm your location fits everything. A bedroom, garage, or living room typically works better than a kitchen or bathroom.
Temperature and humidity matter significantly. Extreme cold makes materials brittle and adhesives sluggish. Excessive humidity causes wood to swell and cam locks to bind. Room temperature (18-22°C) is ideal. If assembling in winter, let flat pack pieces acclimate for a few hours before opening the box.
Lighting is critical. You need to see dowel holes, screw positions, and cam lock alignment clearly. Position yourself near a window or use a work light. Poor lighting leads to misaligned panels and stripped screw holes.
Creating a Protective Surface
Unfold the box flat and assemble on top of the cardboard. This protects your floor from scratches and gives you a defined work area. Never assemble directly on tile or hardwood floors, screwdrivers slip, panels slide, and your floor gets gouged.
For larger pieces that need repositioning, use furniture sliders or old towels under the feet to prevent scratching. A helper becomes invaluable here, stabilizing the piece while the other person slides it into position.
Essential Tools for Flat Pack Furniture Assembly
You don't need a full workshop, but having the right tools prevents frustration and damage.
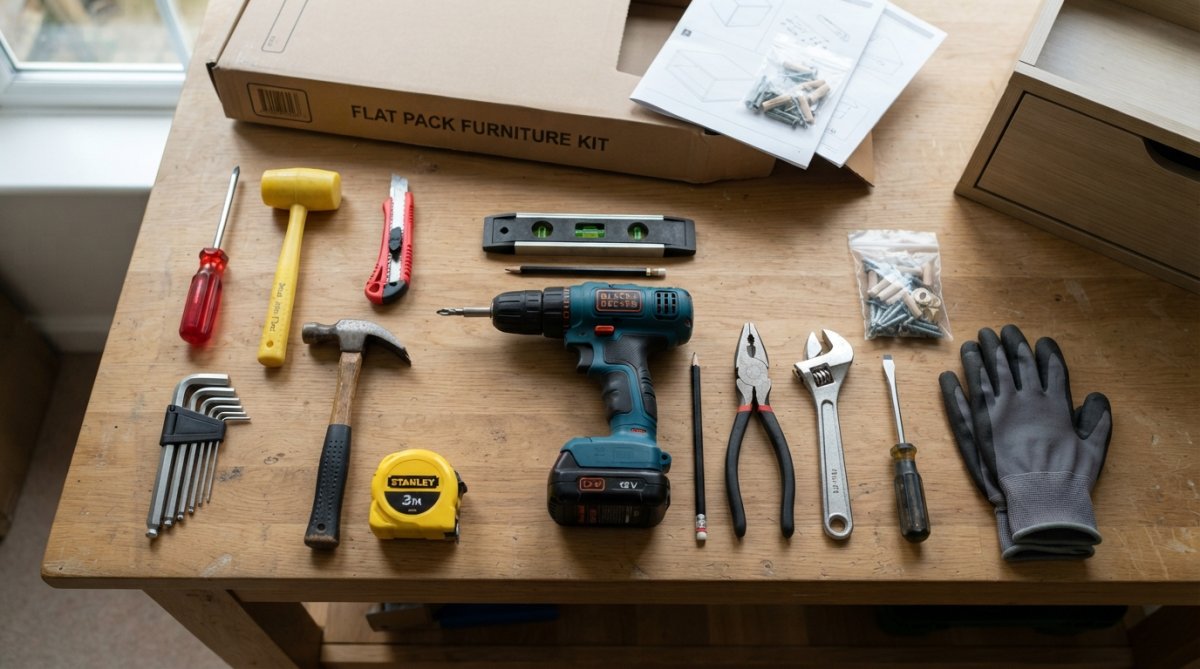
A cordless power drill with a screwdriver bit set is your most important tool. Manual screwdrivers work but are slow and tiring. A drill reduces assembly time by 60% and applies consistent torque, reducing the risk of over-tightening and cracking panels.
An allen key set (hex key set) is essential for most flat pack furniture. Check your instruction manual to see which sizes you need. A rubber mallet helps align panels without damaging them, gentle tapping works better than forcing components by hand. Metal hammers dent and crack wood.
Clamps hold panels in alignment while you insert fasteners. Even basic bar clamps prevent panels from shifting. A spirit level ensures your finished piece is actually level, preventing shelves from sloping.
Hardware Identification Guide
Before starting assembly, identify every fastener in your box and match them to the parts list in your instructions.
Dowels are wooden or plastic cylinders that fit into pre-drilled holes, providing alignment and structural support. Never force a dowel; if it doesn't slide smoothly, the hole might be misaligned. A light tap with a rubber mallet is acceptable.
Cam locks are plastic or metal locking mechanisms that tighten as you turn them. Insert the bolt through the panel, then turn the cam lock clockwise until snug. Over-tightening cracks the plastic.
Screws and bolts come in different gauges and lengths. Using the wrong size strips the hole or fails to hold. Match each screw to the instruction diagram before insertion.
Shelf pins support shelves in brackets. Count them against your parts list before assembly to avoid discovering shortages later.
Tool-Specific Tutorials
Using a power drill safely: Start at low speed until the screw seats, then increase speed. This prevents the drill from twisting and stripping the hole.
Allen key technique: Push the hex key fully into the socket before applying pressure. Partial insertion causes the key to slip and round the socket.
Mallet application: Hold the mallet loosely and let its weight do the work. Light, controlled taps align panels better than aggressive strikes. If something won't align after three gentle taps, stop and check alignment.
Reading Instructions and Organizing Hardware
Read the entire instruction set before opening any fasteners. Manufacturers test these designs thousands of times; they know the correct sequence. Skipping steps or reordering them leads to misalignment and structural weakness.
Creating a Parts Inventory
Count every component immediately after opening the box. Damage claims are easier when documented before assembly. Create a checklist by going through the parts list in your instructions. Organize hardware by type, all screws together, all cam locks together, all dowels together.
Photograph your organized hardware before assembly. If you need to pause mid-project, the photo reminds you where everything is.
Step-by-Step Assembly Process
Most flat pack furniture follows a logical sequence: build the frame, attach panels, install hardware, and secure to the wall if needed.
Building the Frame and Base
Start with the frame or base, your structural foundation. Insert dowels into pre-drilled holes first, then align frame pieces. Dowels provide alignment; don't rely on fasteners alone to pull misaligned pieces together.
Once dowels are seated, insert screws or cam locks. Tighten fasteners gradually and evenly in a cross pattern (top left, bottom right, top right, bottom left) to distribute pressure evenly.
Check that your frame is square by measuring diagonally from corner to corner. Both measurements should be identical. If different, your frame is racked, loosen fasteners, adjust alignment, and retighten.
Don't over-tighten fasteners into wood. Excessive torque strips the hole and weakens the joint. Tighten until resistance increases noticeably, then stop.
Attaching Panels and Components
Once the frame is solid, attach side panels, back panels, and shelves. Align panels carefully before fastening; misalignment compounds as you add more components. Use clamps to hold panels in position while inserting fasteners.
For shelves, ensure they're level before tightening. A shelf that slopes will look visibly wrong and cause items to slide. Back panels provide lateral stability and are structural, not decorative.
Installing Hardware and Fasteners
Install hinges, handles, and other hardware last, after the main structure is complete. Use the correct screw length, too short and the hinge won't hold; too long and the screw pierces through the panel. Hardware alignment matters for both function and appearance.
Common Flat Pack Mistakes to Avoid
The most common mistake is skipping the instruction manual's recommended sequence. Manufacturers design assembly order for a reason, it prevents misalignment and ensures structural integrity.
Over-tightening fasteners is the second most common error. Stripped screw holes weaken joints and can't be repaired without replacing the component. Tighten until snug, then stop.
Ignoring misalignment during early assembly causes problems later. If your frame isn't square after step two, fixing it becomes exponentially harder by step ten. Check alignment frequently and correct issues immediately.
Assembling in the wrong location is surprisingly common. Assembling a wardrobe in a bedroom, then discovering it doesn't fit through the doorway, wastes hours. Measure your space and doorways before starting.
How Long Does Flat Pack Furniture Assembly Take?
Assembly time varies based on piece complexity, your experience, and whether you have help. A simple bookshelf takes 30-45 minutes for an experienced person. A wardrobe or bed frame takes 2-4 hours. Complex pieces can take 6+ hours.
The first time you assemble a particular style takes longer as you learn the manufacturer's conventions. The second similar piece assembles 30-40% faster. Having a helper reduces assembly time by 25-35%.
Flat Pack Assembly Tips for Success
Read instructions in sequence, not randomly. Assemble during daylight or with strong artificial lighting, poor visibility leads to misaligned fasteners and damaged components.
Use a power drill instead of manual screwdrivers for any piece with more than a dozen fasteners. Test stability before declaring the piece complete by pushing on shelves and pulling on doors.
Working With a Helper or Partner
A second person transforms flat pack assembly from frustrating to manageable. One person aligns components while the other fastens them. Assign clear roles: one reads instructions and manages hardware, the other aligns and fastens. Communicate clearly about what's happening.
Post-Assembly Maintenance and Stability Checks
After assembly, check that all fasteners are tight. Vibration during transport or normal use can loosen screws over time. For tall pieces like wardrobes or bookcases, secure them to the wall with appropriate brackets to prevent tipping.
Wood components can swell or shrink slightly with humidity changes. If doors become difficult to open or close, adjusting hinges usually solves the problem.
Disassembly for Moving
Flat pack furniture is designed to disassemble. Before disassembling, photograph the assembly sequence to remind you how components fit together when reassembling. Label fasteners and components with tape so you don't mix them up.
Store hardware in labeled containers. Wrap panels in blankets or cardboard to prevent damage during transport. Reassembly at your new location follows the same process as initial assembly, and most people reassemble 40-50% faster than their initial assembly.
Flat pack furniture assembly doesn't require special skills, it requires patience, the right tools, and a systematic approach. The Family Nest offers furniture designed for straightforward assembly, complete with clear instructions and reliable hardware that won't strip or fail mid-project. Our commitment to quality means your assembled piece will be stable, level, and built to last. Start with proper workspace setup, follow instructions exactly, and take your time with alignment. You'll end up with furniture that looks professionally assembled and functions perfectly for years to come.
Frequently Asked Questions
What tools do I actually need to assemble flat pack furniture?
Essential tools include a screwdriver (Phillips and flathead), an allen key set, a power drill for efficiency, and a rubber mallet for dowel insertion. A level ensures structural integrity, while a tape measure helps with alignment. Having a workbench or sturdy table as a protective surface prevents damage. Most flat-pack items include the necessary fasteners, screws, bolts, cam locks, and dowels, so you won't need to purchase additional hardware separately.
How long does it typically take to assemble flat pack furniture?
Assembly time varies significantly depending on complexity and your experience. Simple items like shelving units may take 30-60 minutes, while larger pieces such as wardrobes or bed frames can take 2-4 hours or longer. Working with a helper generally reduces time by 25-40%. Having all tools prepared, workspace organised, and instructions read beforehand accelerates the process considerably. Don't rush, careful assembly prevents alignment issues and ensures long-term stability.
What are the most common mistakes people make when assembling flat pack furniture?
Common mistakes include skipping the instruction manual, over-tightening fasteners (which can strip threads or crack components), assembling in the wrong location and struggling to move finished pieces, and neglecting to check alignment before fully securing panels. Many people also fail to inventory all hardware first, leading to missing parts mid-assembly. Not using the correct tools, such as attempting to use a hammer instead of a rubber mallet for dowels, can damage components. Taking time to prepare your workspace and follow instructions carefully prevents most of these issues.
Is it better to assemble flat pack furniture alone or with a helper?
Having a helper or partner significantly improves the assembly experience, especially for larger pieces. A second person can hold panels steady, apply pressure during alignment, and manage the instruction manual while you work. This reduces strain, speeds up the process, and minimises mistakes. However, smaller items can certainly be assembled solo with patience. If assembling alone, use clamps or temporary supports to stabilise panels. If you're renting and concerned about disassembly for moving, having a helper makes both assembly and eventual removal considerably easier and less stressful.
This article was written using GrandRanker